
Battery for your motorbike Beta RR RR 250 14 CV (2011)
Battery analysis for your Beta RR RR 250 (2011)
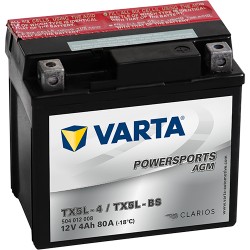
Quick answer You need an AGM battery of 4 Ah. Our recommendation: VARTA 504012008.
Prices and availability updated on 15/07/2026
Based on the batteries we found for your vehicle, our experts help you pick the right one.
📋 What we found
For your Beta RR RR 250 (2011) we found 1 compatible Start-Stop battery.
⚡ Battery type for your vehicle
✓ Your Beta RR RR 250 (2011) uses the Start-Stop system. Every battery shown is compatible — no conventional options to confuse you.
🔋 Technology (AGM / EFB)
✓ All Start-Stop batteries in the list are AGM — the most advanced technology. Perfect if your current battery was AGM or EFB: AGM always replaces both. Remember to register it via OBD if your car has a BMS (BMW, Audi, VAG, Mercedes…) so the alternator charges it correctly.
📊 View AGM vs EFB vs Conventional — full comparison
Here are the key differences between the three starter battery technologies. AGM is the most advanced technology (and the priciest); EFB is the middle ground for basic Start-Stop; conventional (also called flooded lead-acid) is the classic choice for non-Start-Stop cars.
| AGM | EFB | Conventional | |
|---|---|---|---|
| Charge cycles | Up to 3× more Start-Stop cycles than a conventional (cycle endurance certified to VDA standard) | ~2× more Start-Stop cycles than a conventional (cycle endurance certified to VDA standard) | Designed for start + alternator, not for repeated cycles |
| Expected life | 5-7 years under average use | 4-5 years under average use | 3-4 years under average use |
| Start-Stop compatible | ✓ Yes, even advanced systems (regenerative braking) | ✓ Yes, basic and mid-range Start-Stop | ✗ No — degrades within months |
| Cold start | Excellent (higher CCA) | Very good | Adequate |
| Relative price | €€€ (highest) | €€ (mid) | € (lowest) |
| Recommended for | Premium cars with advanced Start-Stop, many electrical accessories, heavy urban use | Mid-range Start-Stop cars, mixed city/motorway use | Non-Start-Stop cars, standard use, tight budget |
| Replacement rule | Replaces AGM and EFB; NEVER use EFB where AGM was original | Replaces EFB and conventional; does NOT replace AGM | Only conventional; not suitable for Start-Stop |
⭐ Our recommendation
For your Beta RR RR 250 (2011) it's the recommended battery: VARTA 504012008. Its specs: AGM technology, 4 Ah capacity, 80 CCA cranking power, 114×71×106 mm dimensions.
See this battery →Thanks for your feedback! We keep improving.
💬 Customer opinions are very important to us. We'd appreciate it if you could leave a short comment about what you liked.
With the currently active filters no battery from the list is shown. Remove a filter to see compatible options.
Verified selection
- Class: Motorcycle Batteries
- Brand: Beta
- Model: RR
- Engine: RR 250
- Year: 2011
Start Stop Battery
Battery for start-stop vehicles. Also a strong choice for more cycles, better charge recovery and longer service life.

| Categoría | Make | Referencia | Capacidad | Arranque en frío | Medidas | Tecnología | Price | |
|---|---|---|---|---|---|---|---|---|
| Start Stop Battery | VARTA | 504012008 | 4 Ah | 80 A | 114×71×106 mm | AGM | €21.63 | Más info |
Frequently asked questions
- The Beta RR RR 250 2011 may use different batteries depending on engine and equipment. We found 1 compatible batteries. Check dimensions and positive terminal position before purchasing.
- Yes, you can install a higher capacity (Ah) battery as long as the physical dimensions fit your Beta RR RR 250 2011 battery compartment and the positive terminal position matches.
- Yes, we detected Start-Stop compatible batteries for your Beta RR RR 250 2011. If your vehicle has Start-Stop, it needs an AGM or EFB battery. An AGM must always be replaced with AGM. An EFB can be replaced with EFB or AGM. Never install a conventional battery in a Start-Stop vehicle.
- Motorcycles can use GEL, AGM, or conventional batteries. GEL batteries are ideal for occasional use. AGM batteries are the best option for heavy use or high-power motorcycles. Always check the polarity before installation.
- Polarity indicates which side has the positive (+) terminal. This is critical for motorcycles because some models have the positive terminal on the left and others on the right. Check the label on your current battery or the manufacturer's manual.
- Yes. First disconnect the negative (−) wire and then the positive (+) wire. When installing the new one, connect the positive (+) wire first and then the negative (−) wire. Always respect the correct polarity.
- Use the search tool by selecting your vehicle's make and model. Our system automatically filters compatible part numbers verified by our technicians. If you have any questions, contact us via WhatsApp.
- As they are consumable items, car batteries have a 2-year warranty, truck batteries a 1-year warranty, and all others (motorcycle batteries, cyclic batteries, etc.) a 6-month warranty. If a battery has a manufacturing defect, it will be replaced at no cost to the user.
- Under normal circumstances, batteries usually arrive within 1 to 2 days of ordering. However, there are some cases where delivery may take a little longer: peak seasons (Black Friday, Christmas, etc.), palletized shipments, occasional stock shortages, etc.
- Batteries compatible with the Beta RR RR 250 (2011) have the following dimensions: 114 × 71 × 106 mm (length × width × height) Before buying, check the battery compartment size of your vehicle: a larger case will not fit even if the reference is technically compatible.
Guías
-
Guide to safely replace the battery of the Beta RR RR 250. Estimated time: 10-20 minutes. Tools: 8-10 mm wrenches, 4-6 mm Allen keys or Torx depending on the model. Many bikes require removing the seat or a side panel to reach the battery. Check the manual for fully faired models or those with reverse polarity.
-
Prepare the motorcycle Put the bike on the centre stand — or, failing that, the side stand — on flat, firm ground. Switch off the ignition, remove the key and wait a few minutes for the engine to cool.
-
Locate the battery On most motorcycles the battery sits under the seat, behind a side panel or near the fuel tank. On cruisers and adventure bikes it may be under the tank or in a frame compartment. Check the owner's manual if you can't find it.
-
Remove the seat or access panel Release the seat (usually unlocked with the ignition key) or undo the side-panel screws (4-6 mm Allen keys or Torx are common). Keep the fasteners in order so you don't lose any.
-
Identify polarity and hold-down Find the positive terminal («+», red cable) and the negative («−», black cable). Warning: some motorcycles — especially classic Japanese models — use reverse polarity; always confirm the exact orientation before removing the battery. Check whether it is held by a strap, clamp or plate.
-
Disconnect the negative terminal first Using an 8-10 mm wrench, loosen and disconnect the negative terminal. Move it far enough from the chassis and secure it so it can't touch accidentally while you work.
-
Disconnect the positive terminal Remove the positive protective cap if present and disconnect that terminal. Move the cable aside carefully and shield the area to avoid short circuits.
-
Remove the old battery Undo the strap or hold-down. Lift the battery out keeping it upright; it weighs 2-8 kg depending on type. If it is an old flooded battery, be extra careful not to spill acid.
-
Install the new battery and connect the terminals Fit the new battery matching the original polarity. If it is an AGM delivered dry, follow the manufacturer's instructions to activate it with electrolyte before installing. Connect positive first, then negative, and tighten gently — don't overtorque, the screws can break.
-
Refit panels and verify Reattach the panel and seat. Without holding the starter button for more than 5 seconds at a time, start the bike and check lights, indicators, horn and instrument cluster. Reset the clock and any lost settings.
General reference guide: always consult your vehicle manufacturer's manual before following these steps, as procedures may vary or not be suitable depending on model, year and equipment. If in doubt, consult a professional. baterias.com accepts no liability for damage resulting from an incorrect procedure.
-
-
Knowing your battery polarity (positive on the right or on the left) is the most important step before buying a replacement: connecting it the wrong way can damage the electronics. Estimated time: 2 minutes. Tools: eyes only — no tools required.
-
Locate the battery Open the bonnet of the Beta RR RR 250 and find the battery. It is usually a rectangular block with two metal terminals (large screw heads) on top — one red or "+" and one black or "−".
-
Identify the positive terminal The positive terminal (+) typically has a red cap, red sticker or cover, a raised "+" symbol on the casing, and/or a slightly larger diameter (19 mm vs 17 mm of the negative, in standard European batteries).
-
Face the battery Look at the battery from the label side with the terminals near you — the edge with the terminals should face you, not the back.
-
Determine polarity If the positive pole is on the RIGHT → choose a battery marked as "positive right". If it is on the LEFT → choose one marked as "positive left". (If the label of your current or new battery shows codes like 0, 1, 3 or 4: 0 and 4 are positive right; 1 and 3, positive left — 3 and 4 correspond to batteries with terminals on the narrow side.)
-
Note the reference The label on top shows the reference (e.g. "A9", "TK960", "EA900"). Search for the exact model with that reference and the identified polarity — never change polarity without consulting the vehicle manufacturer.
General reference guide: always consult your vehicle manufacturer's manual before following these steps, as procedures may vary or not be suitable depending on model, year and equipment. If in doubt, consult a professional. baterias.com accepts no liability for damage resulting from an incorrect procedure.
-